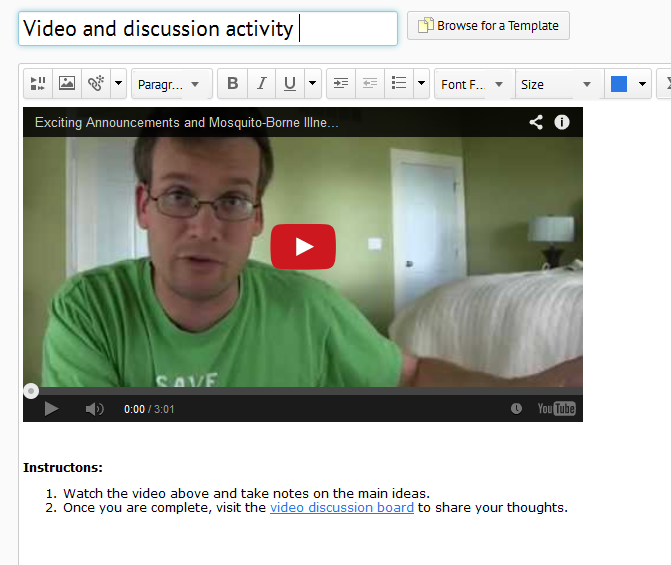
It is good practice to bring your resources into Desire2Learn whenever possible rather than sending students out of your online classroom. This helps them stay focused as well as gives you an opportunity to give instructions and context to a resource.

One good way to do this is to use embed code to bring media into Desire2Learn. Many media sources, such as Ted.com, YouTube, TeacherTube, and infographic sites provide embed code so you can easily bring their content to your students without worrying about copyright violations or the tech to make media play.

Below are instructions for adding embed code to Desire2Learn.

Inserting media in Desire2Learn using embed code

  1. Access your Desire2Learn course, click on content, and navigate to the module you would like to add the video to.
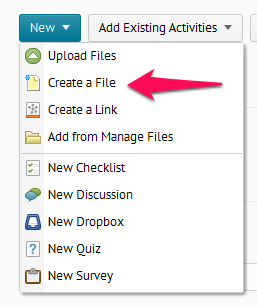
  2. Click on New and then Create a File embed code 2
  3. In the new HTML file that opens enter a title for your page.
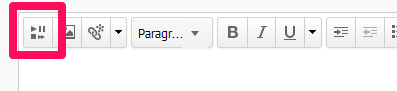
  4. On the tool bar click on the Insert Stuff button.
    embed code 4
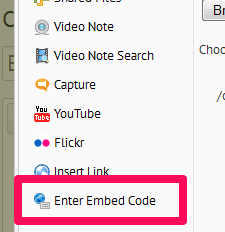
  5. On the left side click Enter Embed Code
    embed code 5
  6. Do not close the Desire2Learn window. Use a new tab or window to go back to the web page where your embed code is.
  7. Copy the embed code for the media you want to embed.
  8. Navigate back to the Desire2Learn Insert Stuff menu. Paste your embed code into the box. You don’t need to change any of the code: just paste it into the box.
    embed code 8
  9. Click Next in the bottom left corner of the Insert Stuff box.
  10. This screen will show you a preview of your media. If this screen is blank you are experiencing an error caused by browsers settings and blocked active mixed content. But we can work around it. Contact the Instructional Technology Specialist for help getting the media into your course.
  11. If your preview looks correct click Insert.
  12. You will now see your video inside the HTML editor. Make any other edits you want to make to the page and click Publish.embed code 12

Inserting media in Desire2Learn using embed code

Getting started with Desire2Learn Dropboxes for Instructors

Dropboxes are one of the most powerful assessment tools in Desire2Learn. It allows you to collect student work virtually, grade without using paper or ink, and immediately publish feedback to the Desire2Learn Grades tool.

The resources below show how to get started with Dropboxes

Getting Started with Desire2Learn 10.3 Dropboxes

  1. How to create a dropbox
  2. Setting dropbox folder availability and due dates
  3. Setting release conditions for a dropbox folder
  4. Adding special access permissions to a dropbox folder – commonly used when allowing late submissions
  5. Editing dropbox categories and folders
  6. Reordering dropbox categories and folders
  7. Deleting dropbox categories and folders
  8. Restoring deleted dropbox folders

Grading Dropboxes

  1. Viewing dropbox folder file submissions
  2. How to grade dropbox submissions in Desire2Learn
  3. Marking dropbox folder submissions as read or unread
  4. Downloading dropbox folder submission files
  5. Uploading and attaching feedback from downloaded submission files
  6. Retracting published feedback
  7. How to use Microsoft Word to write comments in student dropbox submissions
  8. Evaluating students who did not submit or those who submitted outside the dropbox

Desire2Learn Self-Guided Training for Instructors: Just the Baiscs

The following help guides provides the information a new instructor needs to get started with Desire2Learn at Ursuline.

The college-wide guidelines required that you include your syllabus and an active grade book in Desire2Learn, and this guide will take you through that process. Additional requirements may exist from other supervisors, so please check with your supervisor for what is required of your specific course.

  1. Accounts and Getting Started

    1. Insure you have an Ursuline ID number and email address.
    2. Log in to Office 365 to start using your email. User your full Ursuline email address, including @ursuline.eduLog in here: https://login.microsoftonline.com/
    3. If you are full time faculty on campus, set up Outlook on your computer.
  2. Desire2Learn Training

    1. Log in to Desire2Learn: https://ursuline.desire2learn.com/
    2. View the Introduction to Desire2Learn training video or attend a D2L Basics workshop on campus. <Video has been updated 10/31/2014.
    3. Talk with your department head about previous materials available to you. If they are created you are able to copy previous course materials into your new D2L classrooms so you don’t have to start from scratch.
  3. Setting your course start and end dates

    1. Choose and set your course start and end dates, and set it to active.
      The start and end dates in Desire2Learn are when the course will be available to students. You can open it earlier, extend it past the end of the course, or leave it open indefinitely. It’s up to you. By default, the start date is 30 days before the first day of class and the end date is 7 days after the end. You can change these dates to whatever you want them to be. These dates are when the course is visible to students.Once you have your start and end dates chosen, make sure you also set the course to Active or it will not open on the day you specified.
  4. Enrollment

    1. Enroll other instructors, TA’s, and anyone else who will need access to your course.
      This is commonly used for clinical adjuncts, TAs, or other instructors who you want to be able to see and help you with your D2L classroom. You do not need to enroll students; they will be enrolled automatically.
  5. Course Content

    1. Learn about the way the Content tool is organized and designed to be used.
    2. If you have content form a previous or master course you would like to bring over, use the Import/Export/Copy components tool to bring the content into your course.
    3. Create course outline: Modules and submodule structure
      *What Desire2Learn calls “modules” are basically just organizational folders. This name does not correspond to the UCAP Modules.
    4. Upload your syllabus and any other documents you want to post for your students
    5. Upload any important files and create links to any important web pages
    6. Add a link to your course for student to access the Ursuline Student Resources website. The website is listed here: http://www.ursuline.edu/Student_Life/
    7. Post Welcome/Get Started News item
  6. Gradebook

    1. Set up your gradebook using the Setup Wizard
    2. Create grade categories and grade items
      To learn more about the grades tool visit the comprehensive Grades Step-by-Step guide.

Once you have completed these tasks, you Desire2Learn class will meet the basic university-wide requirements.

If you would like to learn more about additional tools in Desire2Learn visit the Getting Started with D2L for New Instructors: Advanced Tools resource.